
A common problem with heat shrink packaging is holes in the finished product. Often, the finished product looks great, except burn holes are found in an undesired location. Adjustments can quickly be made if the cause is located, and hole-free products will follow. This post is about determining what is causing the holes in your finished shrink wrap package and what adjustments can be made to fix the problem. It is essential to identify the type of equipment being used.
Heat Gun

#1 If using a heat gun and experiencing holes in the finished product, there are only a couple of issues that could be occurring. We recommend sealing the shrink material entirely and thoroughly inspecting the seal seams for holes before trying to shrink the material. Ensuring there are no holes in the shrink wrap before applying heat is essential.
If small holes are found in the seal seam, we recommend looking into the heating element used for sealing. If no spots are found upon full inspection of the seal seams, we would say it is the operator at fault with a heat gun.
Some thin and low-temperature films can develop holes quickly, and we understand it can be difficult not to burn through the material. The two primary factors are the distance the heat gun is away from the shrink material and the speed the gun is moving.
#2 The end of a heat gun becomes very hot, even on a low setting. Placing the heated end near the shrink material will cause holes every time and potentially be harmful to the product(s) being wrapped. We recommend a minimum of 8 inches from the heat gun to the shrink material. Many thin materials will need 12 to 14 inches from the shrink film.
#3 If the operator is undoubtedly holding the shrink gun more than eight inches from the film, they are holding the heat gun in place for too long. As the shrink film contracts, the material becomes thinner and easier to burn through. We recommend keeping the heat gun moving. The film heats and shrinks as the heat gun moves around the product. Never hold the gun in one place.
Shrink Tunnel
A shrink tunnel has a continuous conveyor transporting products through the inner chamber. There are different types of shrink tunnels. Steam tunnels use steam to shrink sleeves onto bottles and cylindrical products. Infrared shrink tunnels have infrared lights inside the tunnel on the sides and top. Convection tunnels have a heater bank and a blower fan to circulate air throughout the inside of the tunnel.
#1 This troubleshooting is specifically for convection or circulating shrink tunnels. Burn holes can be common problems when starting with a new product or different shrink film. The fix may be simple if you have adjusted the tunnel to reach an acceptable shrink amount, except for burn holes. Some shrink tunnels have hotter spots where the blower motor(s) can be found, which will cause burn holes. We recommend moving the products to a different side of the conveyor belt to ensure no hotspots inside the tunnel. For example, if the products are running down the middle of the conveyor, move them toward the operator. If that doesn’t work, move the product away from the operator to see if a different placement eliminates holes but maintains the right amount of shrink.
#2 If product placement does not eliminate the problem, there are three settings most shrink tunnels will have. The conveyor speed and tunnel temperature settings are standard on basic shrink tunnels. Blower motor adjustments are available on most shrink tunnels, but not all. If your shrink tunnel has a blower motor adjustment, begin there. Reduce blower motor settings until the holes are gone, and the film entirely shrinks around the product.
#3 We recommend adjusting the conveyor speed for tunnels with no blower motor settings or settings turned down while still experiencing holes. That is only if the current tunnel temperature is 350 degrees or less. We recommend adjusting the temperature in small amounts for higher temp settings to eliminate holes.
At 350 degrees or less, leave the temperature alone and adjust the conveyor speed. Slowly increase the speed until the product comes out fully enclosed. Once the right conveyor speed is reached, users can try to lower the temperature to run the tunnel at cooler temperatures. As the tunnel temperature is lowered, the speed of the conveyor will need to slow down as well. Of course, be sure not to reduce the rate and tempeature of the tunnel so low it does not keep up with production.
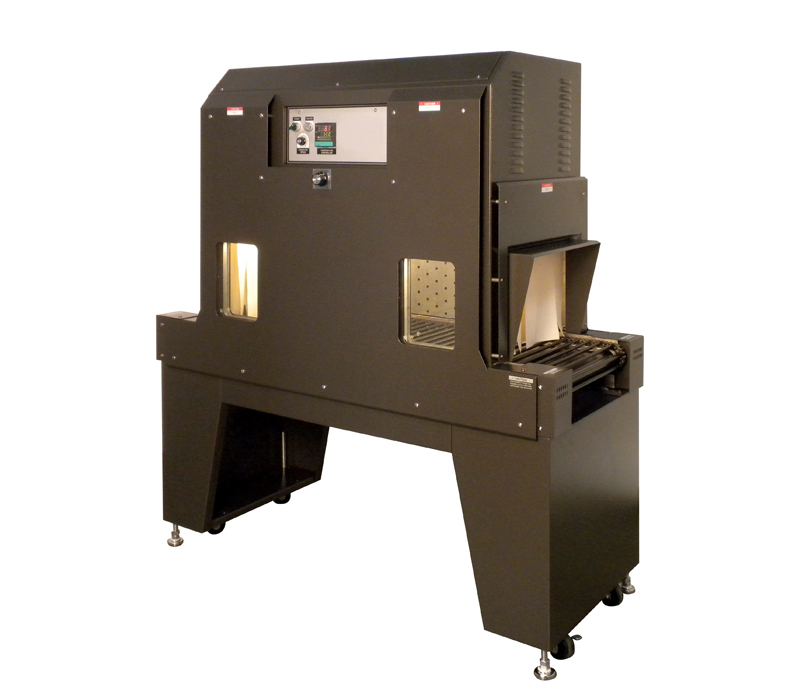
One Step Machine

One-step machines, also known as shrink chambers, have a lid that pops up after a set shrink time. These are popular machines for shrink wrapping less than 500-600 products daily. The small compact design is perfect for confined areas and office spaces.
The operation of a shrink chamber uses magnets to hold the lid closed; then, the seal is made with an L-bar sealer, all while the lid is closed. After the seal is made, a fan begins to circulate heat in the chamber to shrink the film. Once the set shrink time is complete, the lid opens, and products can be removed from the machine.
#1 Holes can happen during the shrinking process, but not enough shrink is a common problem with this machine style. If you are experiencing burn holes after the heat has been applied, you must first try a seal only to be sure the sealer is not causing holes. Thoroughly inspect the seal to be sure no spots are found. If the sealer is causing the holes, consider changing the sealing wire.
#2 If nothing is found in the seal seam, the options to adjust are the temperature and shrink time. We recommend only changing one setting at a time. Lower the temperature if you have both the seal time and temperature maxed out and notice small burn holes. Running the machine at a lower temperature will always help the machine’s longevity. Keep the shrinking time the same, but lower the temperature in small increments until there are no more holes.
By only adjusting one setting at a time until eliminating the holes, the problem can be isolated. The goal is to reach the total shrink rate and the lid pop open before a hole forms. That means minor adjustments are necessary to dial in the machine correctly.
Conclusion
Having holes in your shrink wrapped product means you are close to a professional look. You have reached the full shrink potential and then some. Small adjustments can be made to terminate the holes and attain professional packaging status. Remember only to change one setting at a time. This one tip will help isolate the problem faster and ensure less downtime.
