
Shrink wrap packaging is a relatively simple process in which a machine user can quickly seal and shrink the material. Obtaining the right look and shrink rate for the product being wrapped can be somewhat tricky initially.
Each product is different, and it can be challenging to find the correct settings to reach an optimal shrink package. Selling shrink machines and materials for years, we have learned a few tricks to obtain a better-looking shrink package. See below, and feel free to give us a shout if you need any additional assistance.
- Use the proper shrink film
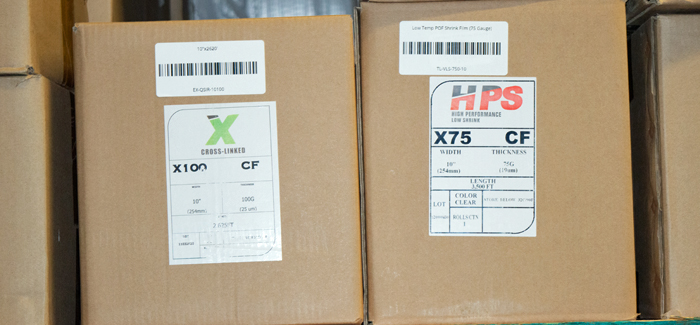
Like any product available on the market, there is a large selection of shrink film materials for sale. Shrink film differences can vary from materials, thickness, shrink rates, FDA approved, fold styles, and more.
An economy shrink wrap is most often used for packaging. Centerfold polyolefin rolls are more common today, but some applications use PVC shrink wrap. The differences between the two are substantial. Understanding each one will help to achieve better shrink packaging.
In a nutshell, shrink PVC is not for direct food contact, and polyolefin is. PVC is really popular for shrink banding on the tops of bottles and containers. Polyolefin, on the other hand, is used for large and small packages. There are many different types of polyolefin shrink film, and selecting the right style is essential. Polyethylene is another form of shrink film used to package heavy or oversized items. Understanding the type of PE and thickness is vital to reaching a uniform package.
2. Choose the right thickness
The correct thickness of shrink film can make or break packaging success. Too thin material with too rough handling will make the shrink packaging tear and come off the product. Too thick of material will make opening the package a nightmare for customers.
The best way to determine the right thickness is with testing. Try to duplicate the handling and shock the package may take during transport. A drop test can be a great way to know how packaging will hold up. A 3 ft drop test on multiple sides is common to simulate rough handling during transport.
Another option is accurate field testing from customers who purchase the product. Offer small incentives for a few customers to unbox products in the store or offer reviews of their unboxing experience. Through assessments and watching this process, you can better narrow down the proper material thickness for the customer.
3. Mark teflon tape for the same seal every time

If using an L bar sealer, making the exact bag size every time will ensure better consistency. The same-sized package each time before being shrunk will help to ensure the same amount of shrink film is used each time.
Most L bar sealers use Teflon tape over the sealing wire or opposite the sealing wire. Place the product in the sealing area and make a seal. Once the right bag size is found, mark the outer edges of the bag with a marker on the tape. These small marks will ensure the package is lined up each time with the same amount of material. This is especially important when packaging products with irregular shapes.
4. Make seals near the middle of the product
Taller products are typically easier to shrink package than shorter products or cubed products. For a square product, making a seal in the middle of the product height will make a big difference in the finished look of the packages. As the material shrinks, the seal will not be distorted or pulled to one side of the package.
Using a manual machine, making the seal in the middle of the product height can be difficult. Semi-auto and fully auto machines should offer a seal adjustment option. Products can be raised or lowered for a seal to be made in the middle of the product.
5. Keep the sealing area clean for better seals
Anyone familiar with shrink wrapping knows with enough time and seals, the sealing wire will not work as well. Many people increase the sealing time to compensate for the poor performance of the wire. The increase in seal time is hard on machine components, and the sealing wire will burn out faster. In addition, the seal will have small strands called angel hairs hanging off of the seal seam from too hot of a seal.
Instead, we recommend cleaning the heat sealing wire and replacing the Teflon tape often. If the shrink machine being used has Teflon tape over the sealing wire, replace it when excessive burns are noticed. The tape is the first line of defense in protecting the sealing wire.
Use a lightly dampened rag to clean off the sealing wire for a shrink sealer that does not have tape over the sealing element. Over time a black residue will form over the wire making it more challenging to seal. This residue causes the need to turn the seal time up and eventually burn out the wire. Be sure to turn off the machine before cleaning the wire.
6. Consistent Heat is the Key
After the shrink film is placed over the product, it must be heated to shrink and conform to the product. Keeping a constant, even heat is the best way to shrink wrap a product. Some people do not have heat tunnels. Using a heat gun, start on low and keeping the gun at least 6 inches from the material heating all the way around. Always keep the heat gun moving and evenly distribute the heat as you wave the gun around the shrink material.
For optimal consistency, a shrink tunnel is the best option. A shrink tunnel maintains a consistent temperature, and products are fed through the tunnel on a conveyor. The conveyor moves at a constant speed for even shrink rates all around. Once a shrink tunnel is properly dialed in, all finished products should look the same. Shrink tunnels do cost considerably more than a heat gun, but pay for themselves in consistency and efficiency.
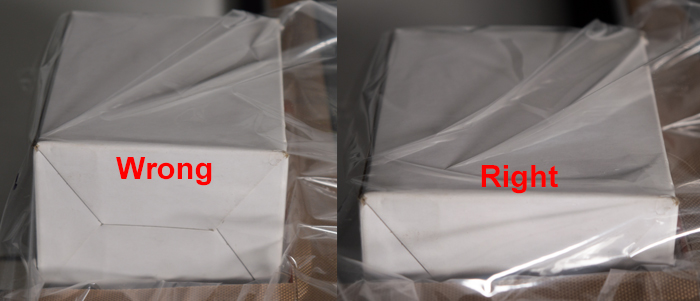
7. Not too much or too little shrink
One of the critical components of setting up a shrink tunnel is achieving the correct shrink rate. Most products will require the full amount of shrink needed to pull the material to the product and eliminate wrinkles. This full shrink rate eliminates bunching in the package’s corners and offers a clean, professional look.
There are other products, though, that can not have a full shrink rate. A perfect example of this is papers or printed materials. Without the use of a backer board, paper products can fold and bend with a full shrink rate. The same goes for delicate items, thin plastic containers, linens, and many other products.
The best way to find out the correct shrink rate is by starting with a full shrink. Apply enough heat to the material burn holes begin to appear. This will ensure you have reached the maximum shrink rate. If the product or products being wrapped are deformed or misshaped, less shrink will be needed. If the product looks okay with the full shrink rate, nothing else needs to be done.
If the items being wrapped are deformed, slowly reduce the heat exposure to the material. As the material shrinks less, you will see how it changes the products being packaged.
If you are unsure if a shrink material will distort your items, we offer a shrink sampling service. Send your products to us, and we will wrap them to find the right amount of shrink rate. Then you can determine without purchasing if shrink wrapping is the right packaging solution.
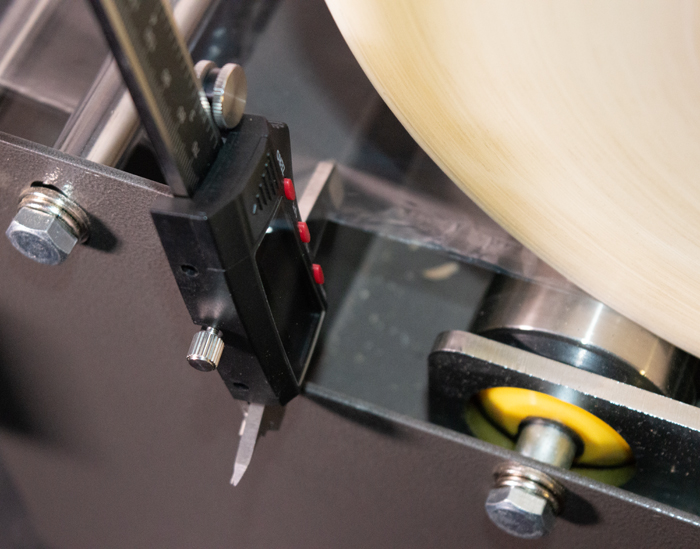
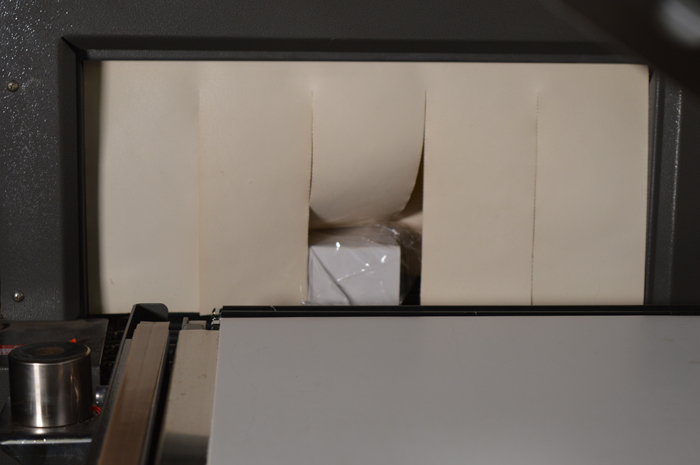
8. Perforator alignment to reduce dog ears
A common misconception of heat shrink wrapping is it forming an air-tight package. When sealing off shrink film around a product, air becomes trapped in the enclosed package. If the air does not have a place to escape as the material is shrinking, it will cause a hole in the material, and the finished package will not look good.
Many shrink materials come with pre-cut holes allow air to escape. Shrink machines also have hole perforators to make small vent holes for air to escape the package. If you are experiencing excessive material build-up in the corners of the package known as ‘dog ears’ proper perforator placement may be the key. Placing the perforators to align with the package’s corners will allow air to escape the corners and a full shrink to be obtained.
Conclusion
The overall process of shrink wrapping is not complicated and easy to complete. Reaching the perfect shrink-wrapped package is slightly more challenging. It takes patience and minor adjustments along the way to find the proper settings.
With the right equipment and materials, a flawless product package can be obtained. Do not get frustrated, and feel free to give us a shout if there is something you can not figure out.
